상품 등록 html 생성
우선, product앱의 templates 폴더에 상품 등록 html을 만들어 주세요.

forms.py 생성
product 앱에 forms.py도 생성해 주세요!!

forms.py를 생성하셨으면 코드를 아래와 같이 입력해주세요.
|
1
2
3
4
5
6
7
8
9
10
11
12
13
14
15
16
17
18
19
20
21
22
23
24
25
26
27
28
29
30
31
32
33
34
35
36
37
38
39
40
41
|
from django import forms
from .models import Product
class RegisterForm(forms.Form):
name = forms.CharField(
error_messages={
'required': '상품명을 입력해주세요.'
},
max_length=64, label='상품명'
)
price = forms.IntegerField(
error_messages={
'required': '상품가격을 입력해주세요.'
}, label='상품가격'
)
description = forms.CharField(
error_messages={
'required': '상품설명을 입력해주세요.'
}, label='상품설명'
)
stock = forms.IntegerField(
error_messages={
'required': '재고를 입력해주세요.'
}, label='재고'
)
def clean(self):
cleaned_data = super().clean()
name = cleaned_data.get('name')
price = cleaned_data.get('price')
description = cleaned_data.get('description')
stock = cleaned_data.get('stock')
if name and price and description and stock:
product = Product(
name=name,
price=price,
description=description,
stock=stock
)
product.save()
|
터미널에 아래와 같이 명령을 입력해주세요
python manage.py makemigrations
python manage.py migrate
base.html 수정
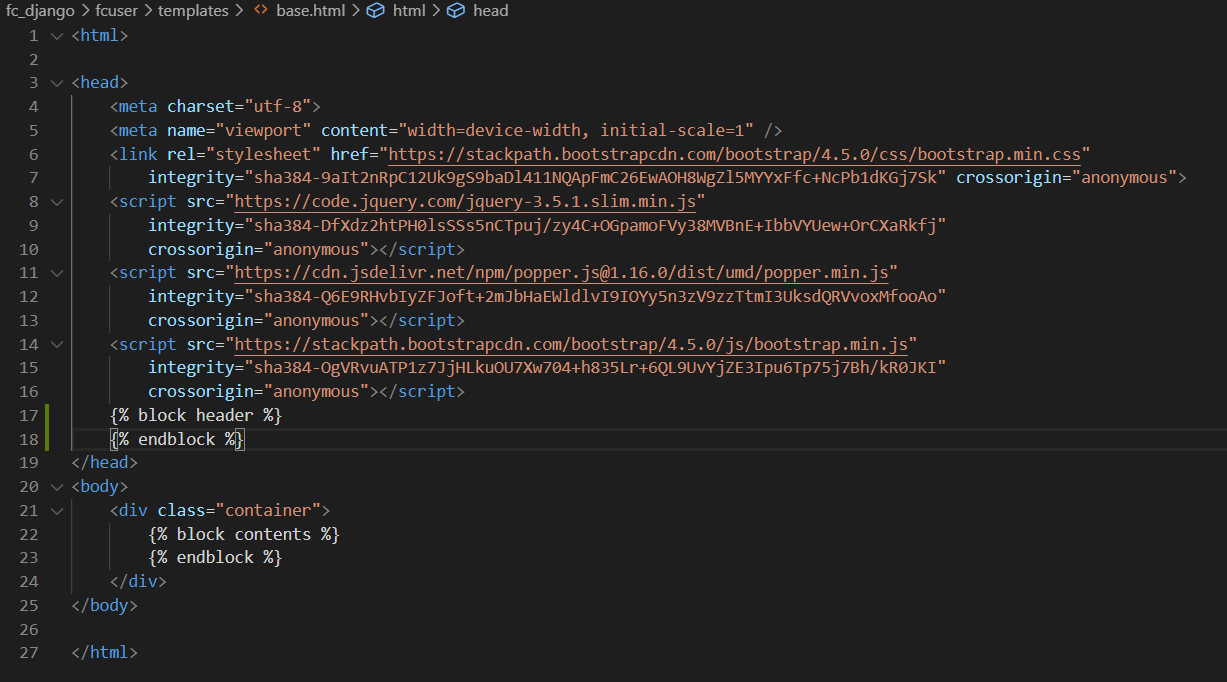
head 부분에
{% block contents %}
{% endblock %} 를 추가해주세요
register_product.html 템플릿 소스 코드 입력
|
1
2
3
4
5
6
7
8
9
10
11
12
13
14
15
16
17
18
19
20
21
22
23
24
25
26
27
28
29
30
31
32
33
34
35
36
37
38
39
40
41
42
43
44
45
46
47
48
|
{% extends "base.html" %}
{% block header %}
<link href="https://cdn.jsdelivr.net/npm/summernote@0.8.18/dist/summernote-bs4.min.css" rel="stylesheet">
<script src="https://cdn.jsdelivr.net/npm/summernote@0.8.18/dist/summernote-bs4.min.js"></script>
<!-- <link href="https://cdnjs.cloudflare.com/ajax/libs/summernote/0.8.12/summernote-bs4.css" rel="stylesheet">
<script src="https://cdnjs.cloudflare.com/ajax/summernote/0.8.12/summernote-bs4.js"></script> -->
<script>
$(document).ready(function () {
$('#id_description').summernote({
height: 300
});
});
</script>
{% endblock %}
{% block contents %}
<div class="row mt-5">
<div class="col-12 text-center">
<h1>상품 생성하기</h1>
</div>
</div>
<div class="row mt-5">
<div class="col-12">
{{ error }}
</div>
</div>
<div class="row mt-5">
<div class="col-12">
<form method="POST" action=".">
{% csrf_token %}
{% for field in form %}
<div class="form-group">
<label for="{{ field.id_for_label }}">{{ field.label }}</label>
{% ifequal field.name 'description' %}
<textarea class="form-control" name="{{ field.name }}" id="{{ field.id_for_label }}"></textarea>
{% else %}
<input type="{{ field.field.widget.input_type }}" class="form-control" id="{{ field.id_for_label }}"
placeholder="{{ field.label }}" name="{{ field.name }}" />
{% endifequal %}
</div>
{% if field.errors %}
<span style="color: red">{{ field.errors }}</span>
{% endif %}
{% endfor %}
<button type="submit" class="btn btn-primary">생성</button>
</form>
</div>
</div>
{% endblock %}
|
views.py 수정
product > views.py 에서 코드를 아래와 같이 입력합니다.
|
1
2
3
4
5
6
7
8
9
10
11
12
13
14
15
16
17
18
19
20
21
22
23
24
|
from django.shortcuts import render
from django.views.generic import ListView, DetailView
from django.views.generic.edit import FormView
from .models import Product
from .forms import RegisterForm
# Create your views here.
class ProductList(ListView):
model = Product
template_name = 'product.html'
context_object_name = 'product_list'
class ProductCreate(FormView):
template_name = 'register_product.html'
form_class = RegisterForm
success_url = '/product/'
class ProductDetail(DetailView):
template_name = 'product_detail.html'
queryset = Product.objects.all()
context_object_name = 'product'
|
product_detail.html 생성
product > templates 폴더 안에다가 product_detail.html 을 생성해주세요
소스 코드를 아래와 같이 입력합니다.
|
1
2
3
4
5
6
7
8
9
10
11
12
13
14
15
16
17
18
19
20
21
22
23
|
{% extends "base.html" %}
{% load humanize %}
{% block contents %}
<div class="row mt-5">
<div class="col-12">
<div class="card" style="width: 100%;">
<div class="card-body">
<h5 class="card-title">{{ product.name }}</h5>
</div>
<ul class="list-group list-group-flush">
<li class="list-group-item">가격: {{ product.price|intcomma }} 원</li>
<li class="list-group-item">등록날짜: {{ product.register_date|date:'Y-m-d H:i' }}</li>
<li class="list-group-item">{{ product.description|safe }}</li>
</ul>
</div>
</div>
</div>
<div class="row">
<div class="col-12">
<a href="/product/">목록보기</a>
</div>
</div>
{% endblock %}
|
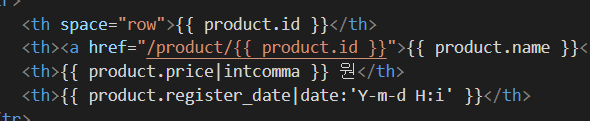
product.html 수정
|
1
2
3
4
5
6
7
8
9
10
11
12
13
14
15
16
17
18
19
20
21
22
23
24
25
26
27
28
29
30
31
|
{% extends "base.html" %}
{% load humanize %}
{% block contents %}
<div class="row mt-5">
<div class="col-12">
<table class="table table-light">
<thead class="thead-light">
<tr>
<th space="col">#</th>
<th space="col">상품명</th>
<th space="col">가격</th>
<th space="col">등록날짜</th>
</tr>
</thead>
<tbody class="text-dark">
{% for product in product_list %}
<tr>
<th space="row">{{ product.id }}</th>
<th><a href="/product/{{ product.id }}">{{ product.name }}</a></th>
<th>{{ product.price|intcomma }} 원</th>
<th>{{ product.register_date|date:'Y-m-d H:i' }}</th>
</tr>
{% endfor %}
</tbody>
</table>
</div>
</div>
{% for product in product_list %}
{% endfor %}
{% endblock %}
|
상품에서 아이디가 보이도록 수정해준거에요
urls.py 수정
fc_django > urls.py에서 아래와 같이 urls.py 를 수정해주세요
|
1
2
3
4
5
6
7
8
9
10
11
12
13
14
15
|
from django.contrib import admin
from django.urls import path
from fcuser.views import index, RegisterView, LoginView
from product.views import ProductList, ProductCreate, ProductDetail
urlpatterns = [
path('admin/', admin.site.urls),
path('', index),
path('register/', RegisterView.as_view()), #클래스는 .as_view() 를 해주어야 함
path('login/', LoginView.as_view()),
path('product/', ProductList.as_view()),
path('product/<int:pk>/', ProductDetail.as_view()),
path('product/create/', ProductCreate.as_view()),
]
|
이제 터미널에서 python manage.py runserver 을 해서 서버를 열고
127.0.0.1:8000/product/create로 가시면 아래와 같이 "상품 생성하기" 화면이 나올거에요
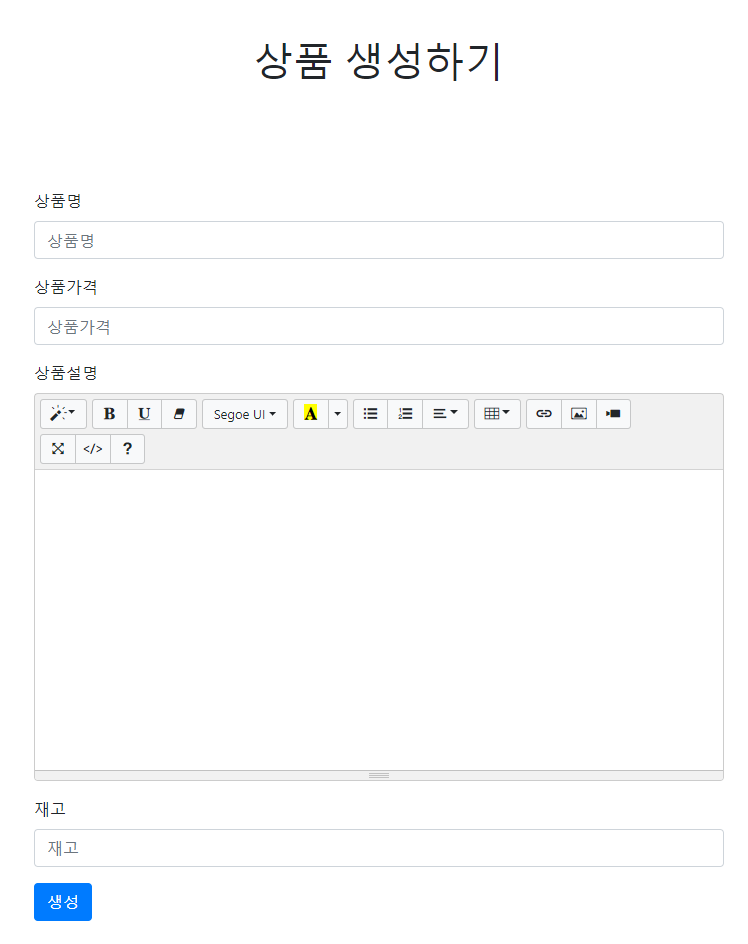
상품을 등록하시고 이미지까지 삽입하면 127.0.0.1:8000/product 로 가시면 상품 목록을 확인하실 수 있으십니다.
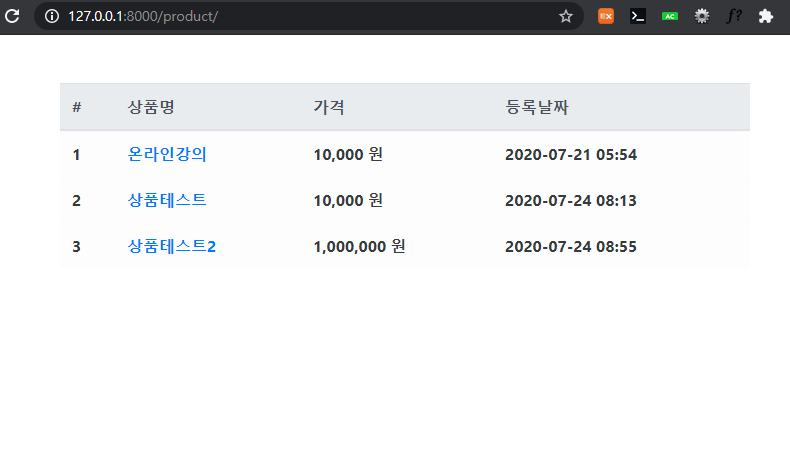
등록한 상품을 눌러보시면 상품에 대한 정보를 확인하실 수 있스십니다.

또 "목록보기" 누르시면 화면이 다시 상품목으로 돌아가는거 확인하실수 있으세요!
그럼 20000~
'Python & Django > Django Framework 실전' 카테고리의 다른 글
| [Decorator] - 페이지 권한 쉽게 설정하기 (0) | 2020.08.16 |
|---|---|
| [view] 상품 주문하기, 주문 정보 조회하기 (0) | 2020.08.12 |
| [view] 상품 목록 만들기 (0) | 2020.07.27 |
| [view] 회원 가입, 로그인 만들기 (0) | 2020.07.24 |
| [설정] Model, Admin 구성하기 (0) | 2020.07.21 |


댓글